Each week, one lucky blog reader will be selected to receive a customized meal plan using the current contents of their pantry, fridge and freezer. After "working my magic", I will supply between 6-8 dinner meal ideas using no more than $10 in additional ingredients. My goal in doing this series is to teach people how to be resourceful, creative and frugal while still planning delicious and healthy meals for their families. If you would like to be featured in the "Dinners by Design" blog series, please check out the details at the bottom of this post.
Meet Erin C.
In addition to being a wife and stay-at-home mom of one, Erin is also my little sister. (Don't worry, the winner was selected completely at random...no favoritism was shown just because she's family!) Erin describes herself as "the kind of person who spends an hour and a half to two hours at the grocery store and comes home without anything to eat." Haha! I'm pretty sure what she means is that she goes shopping and buys groceries, but still can't figure out what to make for dinner with the items she bought. Maybe you can relate? Erin is comfortable cooking from a recipe, but likes the convenience that packaged foods offer. Judging from the list she gave me, I'd say that "quick and easy" recipes are a MUST for this trying-to-eat-healthier family. With that being said, I went ahead and
Pantry
- tuna
- dry beans (black, pinto, great northern)
- lots of variety of pastas
- brown rice
- vegetable oil
- canned pumpkin
- all baking supplies
- spices/herbs/ etc.
- Alfredo sauce
- spaghetti sauce
- tomato juice
- diced tomatoes
- stewed tomatoes
- tomato paste
- tomato sauce
- canned veggies (green beans, peas, corn, cream style corn)
- cream of mushroom and cream of chicken soup
- broth (chicken, beef and vegetable)
- pancake mix
- pizza crust mix
- bread
- peanut butter
- marshmallows
- honey
Freezer
- veggies (peas, corn, carrots, green beans, peppers from the garden, mixed veggies)
- boneless skinless chicken breasts
- ground chuck
- hamburger patties
- bacon
french frieschicken nuggetschicken friesfish sticksdinner rollsgarlic breadCool Whip
Refrigerator
- milk
- eggs
- butter
- apples
- bananas
- lettuce
- tomatoes
- carrots
- potatoes
- onion
- cheeses (Colby, Parmesan, mozzarella, Mexican, cheddar)
Velveeta- all the standard condiments
- minced garlic
- sour cream
Working My Magic and Creating the Meals
When looking at Erin's list, one of the first things I noticed was quite a few frozen, heat-and-eat foods like I mentioned earlier. On the other hand, she had a wide variety of tomato products in the pantry and loads of veggies in the freezer. Those two things are great building blocks for healthy meals! Add in the beans, lean beef/chicken, and some pasta or rice and PRESTO--tasty, healthy meals! It was time to dig out some quick and easy recipes and do some menu magic.
You can click on any linked meal to see that particular recipe. Listed underneath each meal, you will see what we are using from her current stash of foods and what she will need to purchase separately. All recipes make enough for at least 4 adults, leaving Erin and her family with some leftovers for another meal. Cooking once and eating twice means my brother-in-law gets a break from his nightly dish washing duties. You're welcome, Chad!
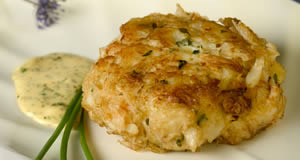
# 1 "Unstuffed" Peppers
What she's using up: ground chuck (1/2 lb.), black beans, green bell peppers, tomatoes, brown rice, cheese, spices.
What she needs to buy: nothing
# 2 Cobb Dinner Salads
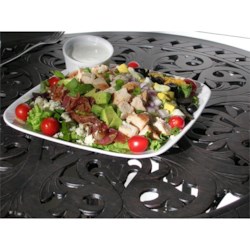 |
| Photo credit: All Recipes |
What she's using up: boneless skinless chicken breasts (2 grilled), lettuce, tomato, corn (optional), cheese, Ranch dressing, eggs (2 boiled), bacon (4 slices)
What she needs to buy: avocado (optional)
# 3 Chicken Supreme with Gravy, Green Beans and Crustless Pumpkin Pie (GF)
 |
| Photo credit: Taste of Home |
What she's using up: boneless chicken breasts (3-4), bread, onions, apples, butter, spices, canned soup, milk, chicken broth, green beans, canned pumpkin, eggs, sugar or honey, vanilla
What she needs to buy: celery, evaporated milk or half-n-half
# 4 Pasta Carbonara
 |
| Photo credit: Kraft Foods |
What she's using up: bacon, pasta, milk, misc. frozen veggies, garlic
What she needs to buy: cream cheese
# 5 Taco Soup (Crockpot)
What she's using up: ground chuck (1/2 lb.), beans, tomatoes, spices, onion, cheese, sour cream
What she needs to buy: tortilla chips (optional)
# 6 Pepperoni Pizza Monkey Bread w/ Marinara Sauce, Raw Veggies & Ranch Dip
 |
| Photo credit: Confections of a Foodie Bride |
What she's using up: pizza crust mix (or make homemade crust w/flour, olive oil, yeast, water & salt), pepperoni, tomato sauce, garlic, spices, mozzarella cheese, *carrots, sour cream, ranch seasoning mix (make with pantry spices)
What she needs to buy: *1-2 raw veggies for dipping (ex. cucumber, green bell pepper or broccoli), *celery (also used in recipe #3)
*Use 3-4 veggies for dipping (carrots, celery and 1-2 others). Leftover raw veggies can be used for lunches or use for making side salads to serve with "Unstuffed" Peppers, Taco Soup or Pasta Carbonara (if desired).
Erin's Shopping List
- celery
- avocado (optional)
- 1-2 fresh veggies of choice
- 8 oz. can evaporated milk or pint of half-n-half
- 8 oz. package of cream cheese
- Tortilla chips (optional) *We like Garden of Eatin' brand blue corn chips.
Total cost approximately $6 without optional ingredients and $10 with them.

Here are some ideas of prep-ahead tasks Erin could do this week, to reduce the amount of time it takes to get dinner on the table. These could all be done in a few hours over the weekend or she could do a couple prep tasks each day while her daughter is napping or at night before she goes to bed.
- Cook 1 lb. of ground chuck, divide into 2 equal portions & refrigerate.
- Soak one pound bag of black beans overnight in crockpot full of water. Drain water in the morning, add new water and cook on low for 4-6 hours or until tender. You'll need 4 cups this week and the rest can be frozen in meal size portions.
- Cook rice and refrigerate until needed. You'll need about 1 to 1.5 cups and the rest can be frozen in small quantities for other meals.
- Chop onions and celery and place in containers in the fridge. You'll need about 1 c. of chopped onion (2 recipes) and 3/4 c. chopped celery.
- Cook 8 slices of chopped bacon (reserving bacon drippings in a small container for Pasta Carbonara recipe). Split bacon up for 2 separate recipes. What's left of the pkg. of bacon could be saved for a breakfast.
- Cook and refrigerate 8 oz. of pasta (reheat for Pasta Carbonara by placing in colander under hot running water or microwaving).
- Grill 2 chicken breasts for Cobb Dinner Salads (or add 2 extra to the crockpot, when doing the task listed below).
- Dice 3-4 chicken breasts and place in crockpot with a little water and cook 4-6 hours or until no longer pink in the middle. You'll need 3 c. for Chicken Supreme with Gravy recipe. Any leftover could be frozen for another meal or added to a tortilla for an easy lunchtime wrap.
- Lay out 10 slices of bread to "stale up" for a few hours, then cut into one inch cubes and place in pantry or fridge until needed.
- Mix up taco seasoning and Ranch seasoning mixes & store in pantry.
- Chop lettuce and tomato for Cobb Dinner Salads, store in fridge.
- Hard boil eggs for Cobb Dinner Salads (or boil extra for grab-and-go snacks or to make egg salad for lunches).
- Cut up raw veggies (like cucumbers, carrots or broccoli) for dipping or salads. Store in sealed containers or storage bags with a bit of water, so they don't dry out.
If you would like to have dinners designed for your family, please comment on this blog post (include your real name so I can contact you!) or send an e-mail with subject line "Dinners by Design" to these_precious_days@yahoo.com by Monday at midnight and tell me why your family should be selected as next week's winner. If you are chosen to be featured in the next "Dinners by Design", you will have until Wednesday at noon to submit a list of the fridge, freezer and pantry items you wish for me to use in creating your meal plan. (That gives you a chance to run to the store and stock the fridge so I have more to work with than mayo, a can of beer and some moldy berries! LOL!)